Last week, I ended with a pressing dilemma. I have been creating tons of four-patches from leftover 1-1/2" squares. I created two postage stamp style blocks, a nine-patch made from four-patches and a four-patch made from four-patches. I then added a border around the four-patch block so the two blocks matched in size. (Important point: All four-patches have the exact same pressing configuration)
Only problem was that the border seams didn't play well with the nine-patch seams when placed next to each other.
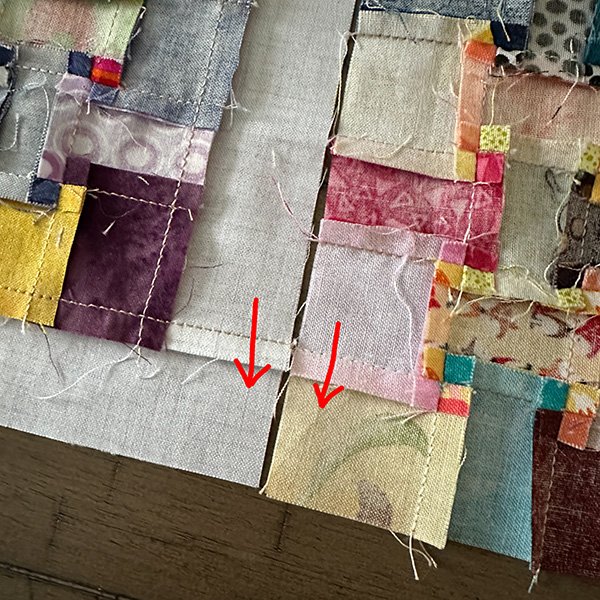
This week, I have the solution to this little concern!
Instead of adding a block border to each side of the four-patch four-patch, then two longer block borders to the top and bottom of the block, I am adding borders to the block starting with a partial seam. For my blocks made from 1-1/2" squares, I cut four strips 1-1/2 x5-1/2".
The strip width, as we discussed last week is the same as the starting square size used for the four-patches (1-1/2") The length is five times the finished size of the four-patch square times five (1" x 5 = 5") plus 1/2" seam allowance.
Remember ALL four-patch block seams must rotate in the same direction, in my case, a clockwise direction viewed from the front of the block (counter-clockwise, viewed from the back from the back).
I add the first block border on the right side of the block as shown below, starting with the bottom corner aligned and the unsewn portion of the seam in the upper right.
If all my four-patch seams rotate counter-clockwise from the front (clockwise from the back). I would align the first border with the top right of the block and leave the last inch or so at the bottom right unsewn.
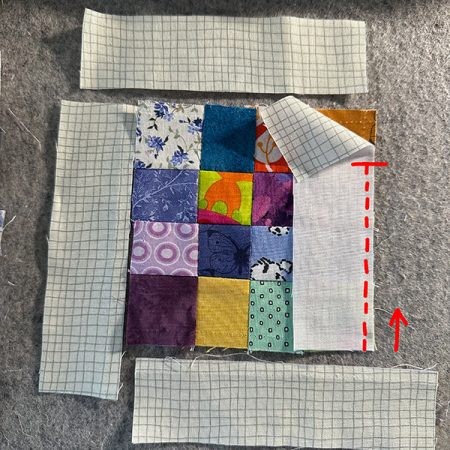
I press the partial seam outward, then rotate the block 90 degrees counter clockwise and add the next border and sew edge to edge.
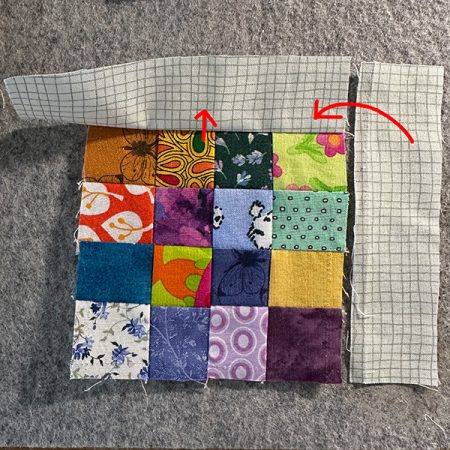
Lather, rinse, and repeat. . .
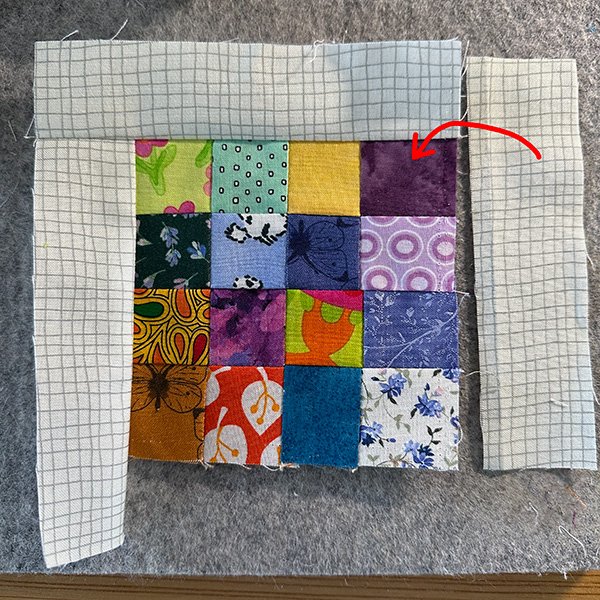
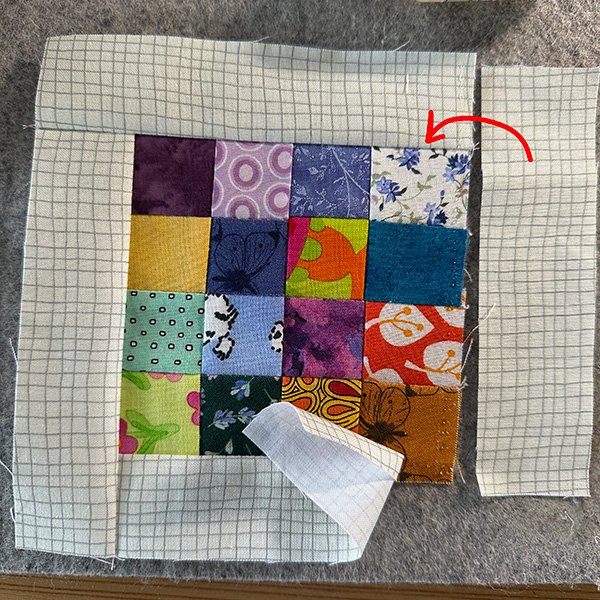
. . . until all four borders are attached to the four-patch four-patch block except for the last few inches of the first border. Then sew the rest of that first seam.
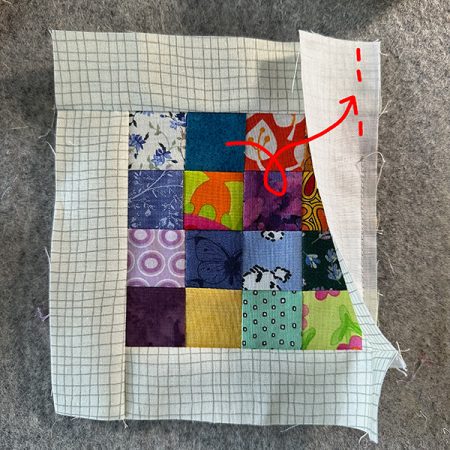
When all the borders are completely attached, it's time for a final press; all border seams pressed outward.
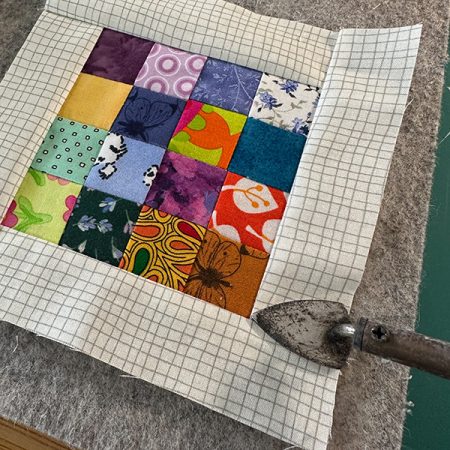
If all the blocks are bordered the same way, all four of the border seams will nest and oppose perfectly when placed adjacent to a four-patch nine-patch.
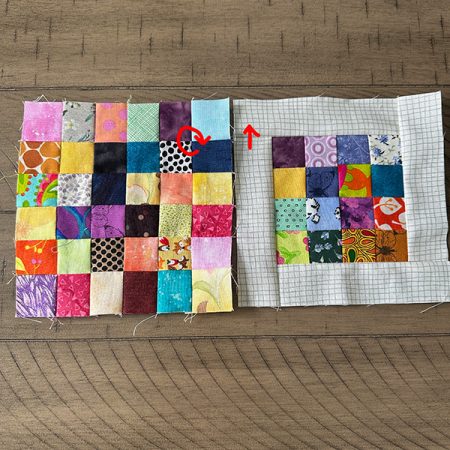
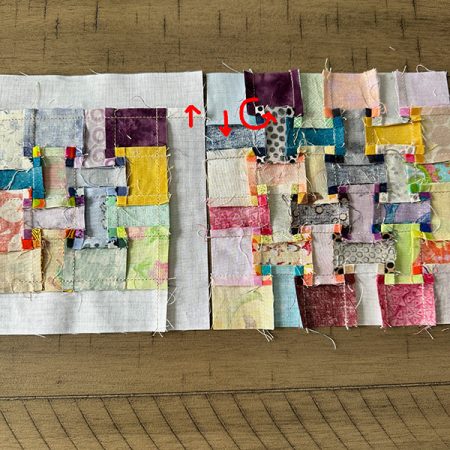
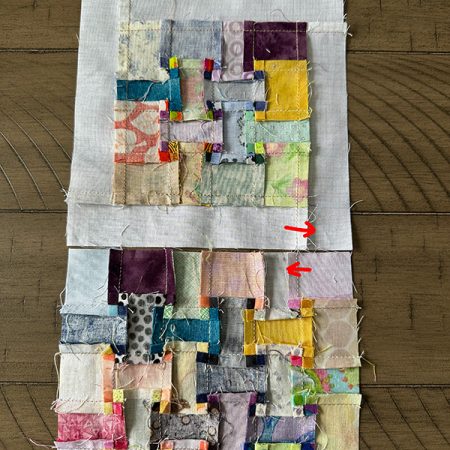
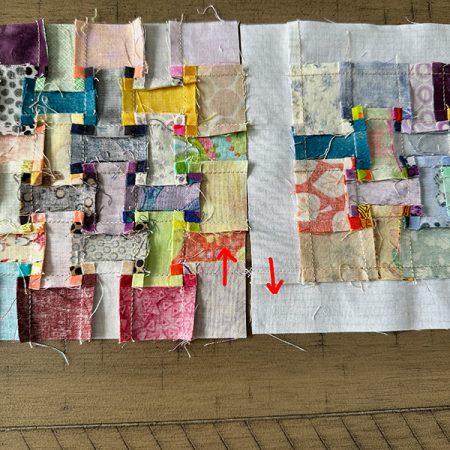
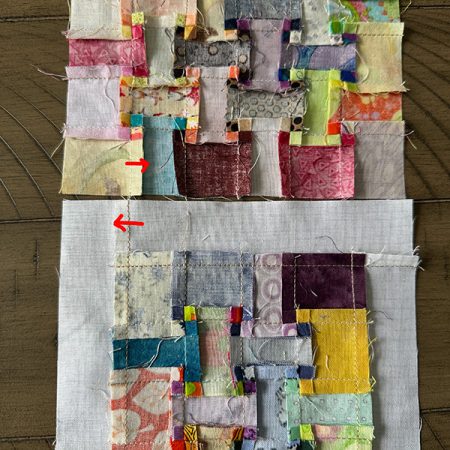
You can see from the back, perhaps, a bit better. Here, the nine-patch stays put and I move the bordered four-patch to each side to show that there is only one seam intersection per side, and those seams nest with the coordinating seam on the adjacent nine-patch block.
Four patch on the left:
Four patch on the top . . .
Four patch on the right . . .
And on the bottom . . .
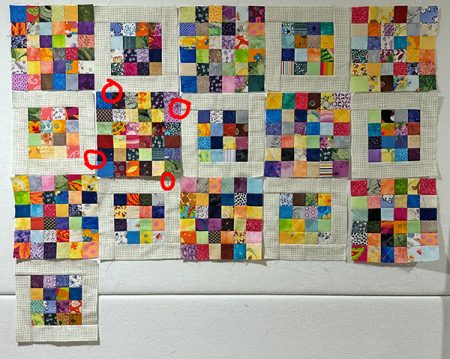
I have a lots of scraps left, and this project is definitely making a dent! It takes a lot of 6" blocks to make a decent sized quilt! I'll keep going and report back with progress eventually. With all the seams involved, this will take a while. The photo below shows my block layout with the matching seam intersection examples circled.
Okay, so why bother with all this hullaballoo? I like solving puzzles. I also like seams that nest and oppose to reduce bulk.
A bonus: This exact same process will work for this two-block postage stamp project with any size scrap square. I used 1-1/2" squares because that's what I targeted. But 2" squares, 2-1/2" squares, 3" squares. They would all come together the same way. The larger the 'postage stamp' starting point, the faster the project will grow.
My scraps were pulled and used randomly, and I chose a fairly neutral goes-with-anything fabric to border my smaller blocks. Now, imagine coordinating scraps for each block to create a block of a certain color or warm and cool blocks or light and dark. Then consider using matching strips to border each block in a different color.
Are you digging into your scrap bin yet? It's time to play!
Happy Stitching!

Head Hummingbird
Hummingbird-Highway.com


Leave a Reply