When I'm working on a big project that involves a lot of repetitive sewing, once I've got the block construction process worked out, I like to make a 'game' of the sewing. My current project is a perfect example to illustrate this concept. Maybe you've done this, too?
In the last Good Migrations email, two weeks ago, toward the continuing effort to reduce clutter in my sewing room, I targeted a collection of 1-1/2" squares in a storage box on a sewing table. I want to use them up by making simple, scrappy, small log cabin-style blocks.
I started in and got the feel for the block by completing a short stack of sample blocks to get started. . .

To make the making a bit more fun, instead of making one block after another, start to finish, I made a few (sometimes one or two, sometimes three or more) of each step in the block's construction and stacked them up on my sewing table. So each time I sat down to sew, I knew exactly where to start.
Each time I go through a stack, I'm not just starting, but also finishing one or more blocks--and that's motiving - to me anyway.
Here's how it works. . .
At the center of each block is a four-patch of 1-1/2" squares - that's the inspiration for this task--to use up that stack of 1-1/2" squares.
I sew a bunch of two-patches to start (chain-pieced), and leave them on the sewing machine, threads uncut.

Next, I take the two-patches from the top of the stack, press them, pair them up and sew them . . .

. . . into four-patches, chain pieced right after the two-patches, leaving them on the sewing machine, threads unbroken.
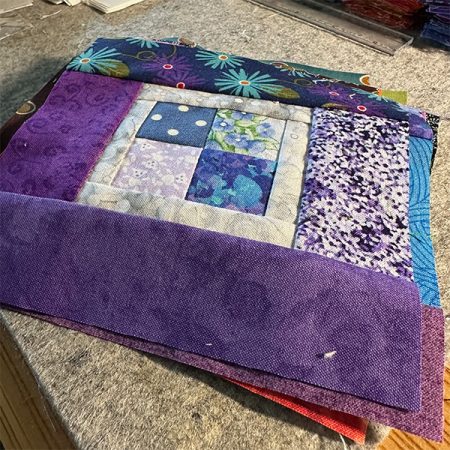
Then back to the stack to press the four-patches from the stack (shown), and then add the first border, chain pieced after the four-patches. Thread uncut.

Each action step is taken from the top of the stack, one sewn seam per step, chain-pieced, left on the sewing machine, thread uncut.

Sometimes there is just sewing, sometimes trimming and sewing on the step from the stack.
This one is a trim-and-sew step; trim the white strip ends even with the four-patch, then add and sew (chain pieced) the first of the longer white perpendicular strips.
(Are you still with me?)
Sometimes, you can combine two steps into one.
In this case, I'm using the Blocloc tool to trim both the strip ends on the longer white pieces and the width of the shorter white piece at the same time. (The white (or gray) pieces are start out too long and too wide with the intent to trim after sewing)


I've skipped ahead a couple of the steps here, all the wider scrappy strips have been added to the center, chain-pieced one side at a time, each seam with its own step in the stack.
The wider strips are cut from a ridiculous amount of fabric pieces found in just about every freaking corner of my work spaces.
While the focus of this project is to use up those 1-1/2" squares, the extra strip usage is a welcome bonus! Blocks are scrappy and fun!
At the bottom of the stack, pay dirt is reached. These last blocks from the stack only had the pressing and trimming step left. Here's the fun part: The same stack that started with making two-patches, also includes finishing some of the blocks.
As a testament to progress, I can add the finished blocks to the design wall. These will be arranged and re-arranged many times before the blocks are sewn together with sashing in between.
Watching this grow is motivating!

I'm not done yet, though. Back at the sewing table, I finish where I started with a single two-patch seam, then I snip the threads between block parts and stack them in reverse order, done blocks at the bottom and two-patches at the top . . .

. . . so I can begin the process all over again with a fresh stack, ready for my next sewing session. I need quite a few more blocks before this is a quilt!


With all these stacks and stacks, you knew there had to be a stack of trimmings, too!
Happy Stitching!

Head Hummingbird
Hummingbird-Highway.com


Awesome! This was very motivating!
I love this use of 1 1/2″ squares. Recently I have been going through my scraps and cutting down into usable sizes like you do in your scrap therapy system. I have started going as small as the 1 1/2 ” squares. Now I know what to do with them! Can’t wait to see the pattern, but will be kitting some of the scraps for these blocks. Thanks so much for sharing the process.
I used this exact method in making the flags for the high school’s flag corps. I made many flags for them and devised this system after making the first flag. Whenever I had to stop, I always knew exactly where I was starting and that saved me countless minutes trying to figure out where I was. These flags were large and involved many colors and shapes and I had to make 33 of them. Often I had to design a way to sew them together so they did not pucker or cause uneven points. Always a challenge – but I loved it. When our band/flag director moved to a new school across the river, part of his deal with the school was that he could use me to make his flags. When they saw the flags I had made, they agreed and I continued making his flags. Interesting job!